Tu sei qui
Esercitazione 1_Solar Analysis_Lorenzo Pierini
PROCESS:
Step 1: Start Autodesk Vasari, create a New project, then click Project Units in the Manage menu. Change the preset units to the metric units then press ok.
Step 2: To set the location of your study you need to click Location in the Analyze menu. Insert the address in the Project Address area then click search. Set the satellite view then work with the zoom on the left to get the location you're looking for. Click Import Site Image, adjust the view and click ok.
Step 3: Now you need to create the buildings for the Solar Analysis, to do so you need to click the Create Mass button in the Model menu.
Select the Line tool in the Draw box and start creating the outline of the buildings, one at a time (be sure to close all of the outlines otherwhise you won't get the surface to extrude), then press Finish Mass. If you click inside the outline you'll get two arrows on Z axis, drag the top one until you reach the height you want.
You can also adjust the height of the building just clicking on the quote near the building and insert the measure yourself. Every time you finish extruding a building press Finish Mass.
Step 4: To proceed to the analysis you need to set the Sun Settings in the lower left corner, clicking on the little Sun icon. Set the Date and Time you choose for your analysis then press ok. Rember to click the little icon right of the Sun to activate the Shadows!
Step 5: Now you need to set the vista you need for your analysis: click on Camera in the Views box in the Manage menu. First you need to write in the Offset box the height of the camera, then click on the ground to place it and drag your cursor to set the field of view. You'll get a new window with the vista you set.

SOLAR ANALYSIS
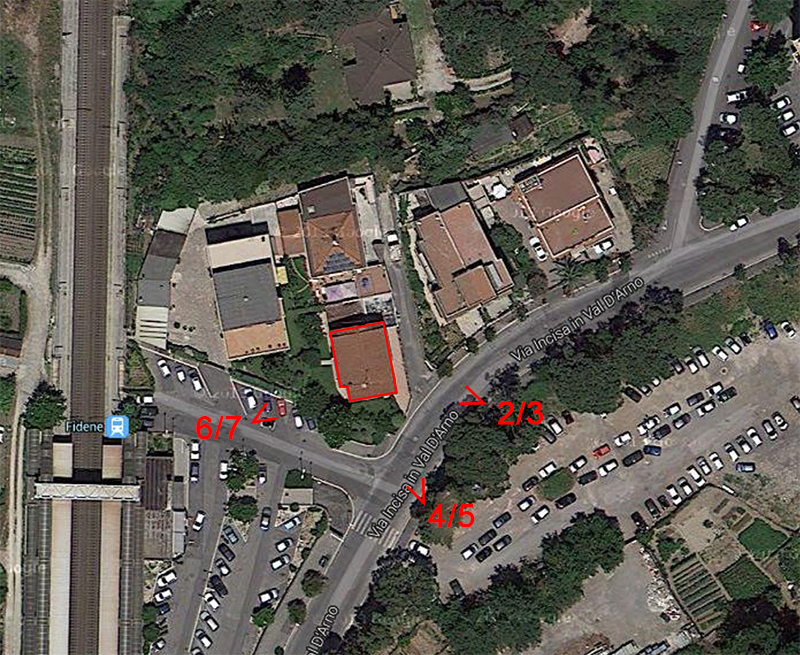
I live in a three storeys building, located just inside the North border of Rome, on Via Incisa in Val D'Arno, between the Colle Salario and Fidene neighborhoods. It's next to other two houses, one on the North side and the other one on the North-West side. The peculiarity of my house is that its pretty much alligned with the North axis, so the facades have a complete irradiation (with its strengths and weaknesses), thanks to its dominant position compared to the other houses. It's important to notice the position of the staircase leading to the upper floors apartment: it's set in South part of the building, the most irradiated.

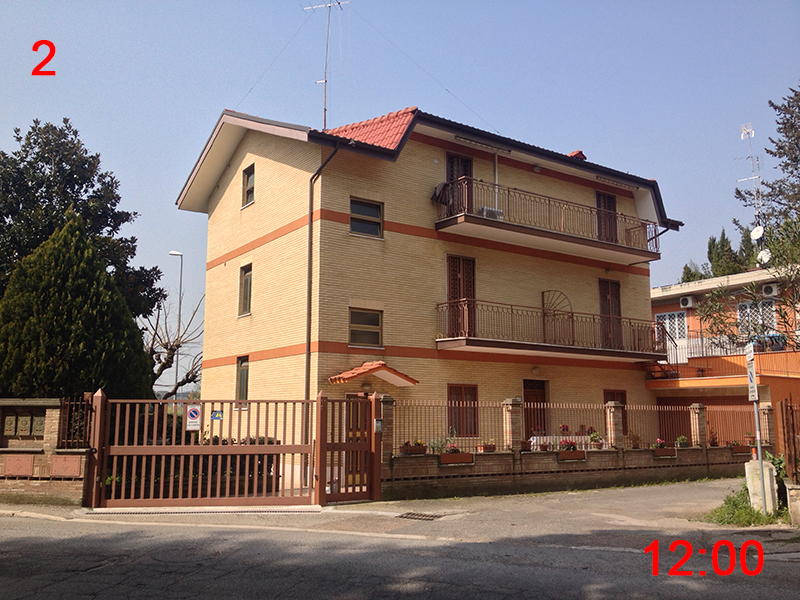
So in the morning the East facade is completely irradiated (Fig. 1, time 08:00), except the shadow of some balconies, until noon, when the Sun is radiating the South facade (Fig. 2/3, time 12:00).

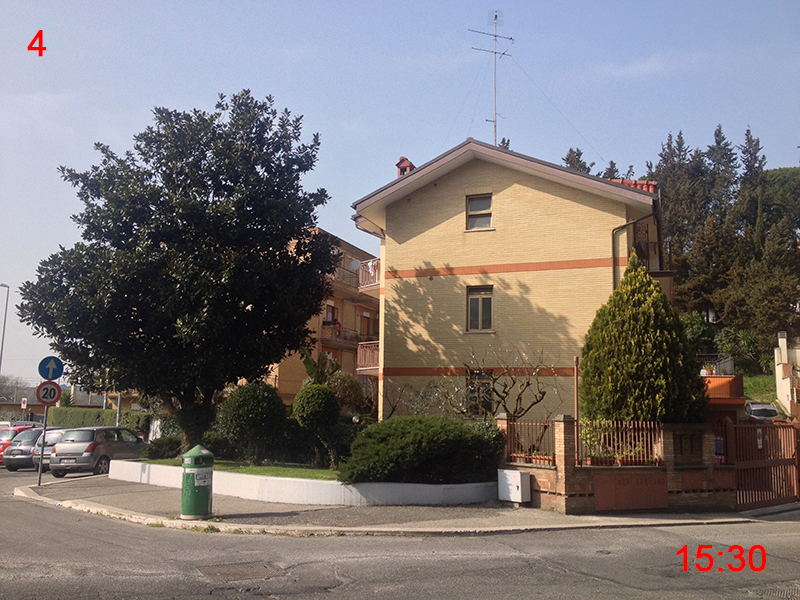
In the afternoon there's a significant shadow on the South facade due to a tall tree in front of the building (Fig. 4/5, time 15:30).

In the late afternoon the Sun radiate the West facade. Its lower part however receives some shadows from some short trees in the backyard (Fig. 6/7, time 17:30). In photoes you can't see some of the shadows because some trees are completely bare in this period of the year.

FINAL THOUGHTS
Through this analysis it's clear that the building is suffering from a complete irradiation during the entire day; vegetetion around the house does not help to reduce it effectively, although there are a lot of tall trees, but too far away from the building. Despite this it's pretty pleasant being in a house that is constantly radiated from the outside, especially in the past cold days; obviusly during summer we need to lower blinds cause in the morning is too hot.
Lorenzo Pierini

Commenti
Denied Access Problem
I attached images without using the writing tool but using the "attach new files" tool to get the link (seemed to work from the preview) but when I posted this, images were not visible, so I deleted them from the post and I'm waiting you to fix this problem of "denied access" to upload my material...
I used the slideshow in the
I used the slideshow in the end, hope you'll fix the problem soon
thank you
for fixing the problem, everything works fine now