Tu sei qui
Esercitazione 4_Parametric Vegetation Modelling_Lorenzo Pierini
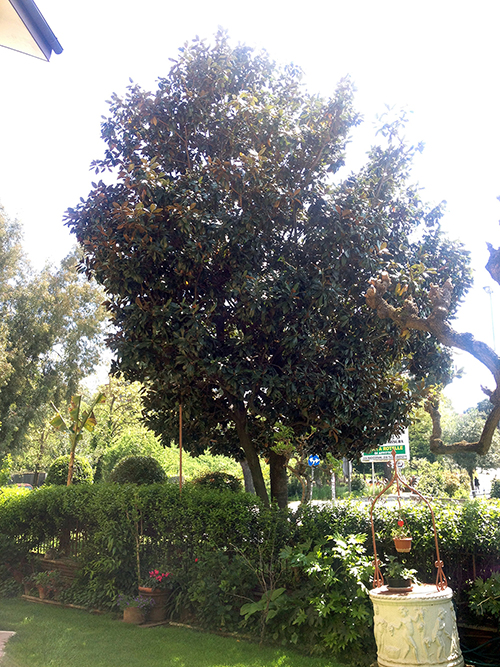
For the parametric modelling I chose the almost 20 years old Magnolia Grandiflora in front of my garden. It's a very tall tree that can reach 25 m in height and now it's tall like my house. The foliage is very wide and being an evergreen tree makes the space below very attractive in Summer, in fact in this period many sit on the benches under the tree. It's also in a good position being on the South side of my house and creating a shadow zone on the South facade for almost the entire day.

PROCESS
Step 1: Start Autodesk Vasari, create a New Family, then adjust the Project Units in the Manage menu. Rename by clicking with the right mouse button on Level 1 the ground level, using Base tronco.
Step 2: Using the Floor Plans view I drew a circle with radius 0.20 m. Then using Radial Dimension in the Dimension box I added the dimension that will be parameterized by going in the Label box, then clicking on Add Parameter, and writing Raggio base tronco.
Step 3: Now we have to set the different heights of the tree, like the end of the trunk, where is foliage is wider or the end of the foliage. So I went on the North Elevation and using the Level button in the Model menu, I set the other three levels, parameterizing their heights using the Dimension tool.
Step 4: Now I create the mass of the trunk set and blocked between the first two layers. I can use the Align tool to align the upper surface of the trunk to the Base chioma level, always remembering to close the lock to allow that surface to be moved with is own level.
Step 5: Now I need to draw my foliage so I drew a big circle on the Base chioma Level and a smaller one on the Sommità chioma Level parameterizing their dimensions.
Using the North Elevation i draw a vertical line and align it to the Base chioma and Sommità chioma Levels and on the vertical Level that go through the tree. In the line Properties I checked in the Identity Data the Is Reference Line box. Now just selecting the two circles and the line and clicking the Create Mass button you will have the model of the foliage.
Step 6: To add a new profile inside the mass we just created we need to click on the surface of the mass, click on the X-Ray button so we can see the profile inside, then click on Add Profile and align it to the Diametro massimo chioma Level. Parameterizing the last dimensions I will now have a fully adjustable tree, from the trunk to the foliage.
The final result is similar to the actual tree, this one in fact has very diversified edges and is not regular as a Cypress can be, but preserve the usual pyramid widening. Below is the final result.
| Allegato | Dimensione |
|---|---|
| 336 KB |
