Tu sei qui
LAB_6-ES_4-Vasari_Orange tree
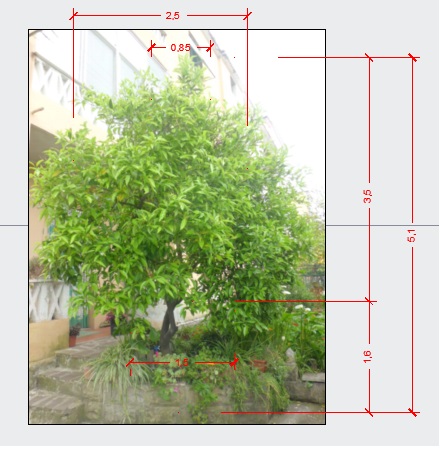
For the fourth exercise I chose to parameterize an orange tree situated in an urban context, in the garden of my house. The purpose of this exercise is just to learn how to use the new commands such as the family and the use of parameters with Vasari.

Orange, in general, is an evergreen tree that among the congeners assumes the largest arboreal development, being able to reach a height of 10-12 m, but ordinarily it isn’t higher than 6-7 m. It has a dense and rounded foliage. its ovate-lanceolate leaves are glossy dark green and leathery; white flowers joined together in inflorescences are characterized by a sweet smell; the result may be from round to subsferico tree, the shape changes depending on the variety, has an external skin more or less smooth, reddish-yellow, rich in essential oils, while the pulp inside has been divided into many segments, rich juice, covered by a transparent membrane.
In order to create a model of its, different parts of the tree such as the trunk and the foliage, must be parameterized. In this way it is possible to change the size of these elements as needed.
This geometry parameterized that I'm going to create will be called “Orange Tree”.
First of all we have to create the new family by going to New, Family, Conceptual Mass, Mass.rft.
Then it will open a new area of work in which we must set the meter as measurement unit.
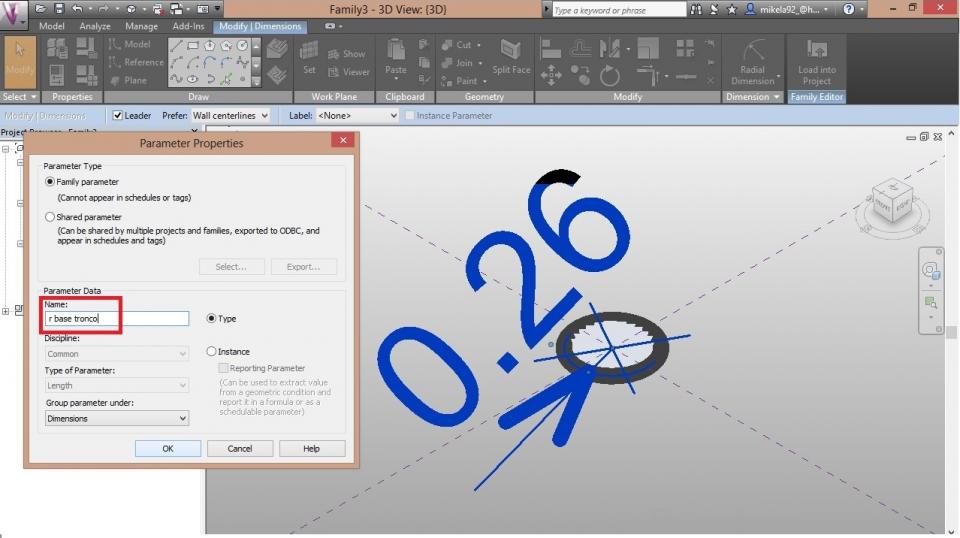
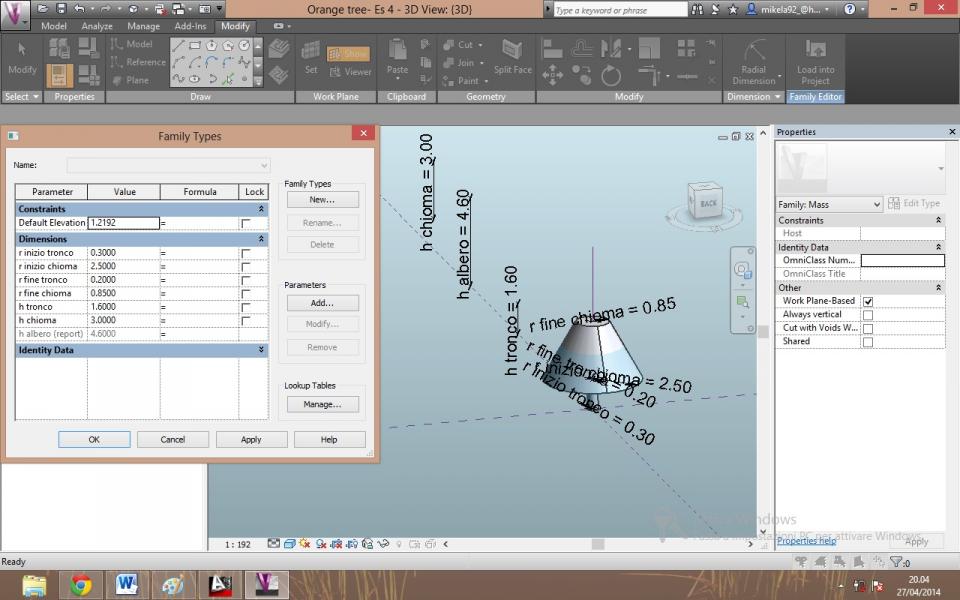
The First step is to draw a circle in first level. Then the radius of the circle must be sized by going to the Modify, Dimension, Radial dimention.

The second step allows you to configure the radius of the circle by selecting the dimension and clicking on Label, Add parameter. So it will open a window where we can rename the parameter as “base tronk radius”.
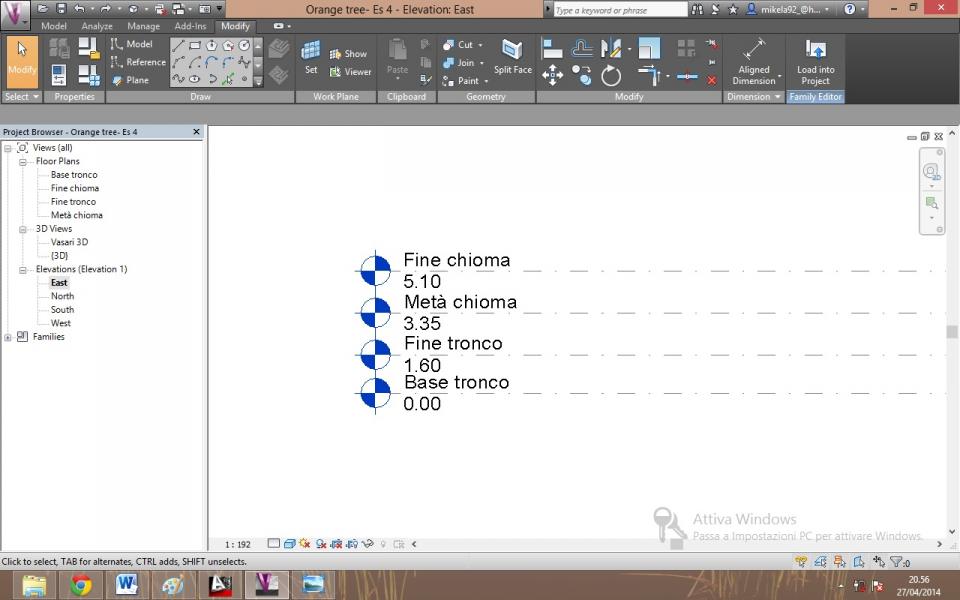
The third step is to create the necessary levels for the model. I renamed level 1 as “trunk base”, level 2 as “end of the trunk”, level 3 as “half foliage” and level 4 as “end of foliage”.
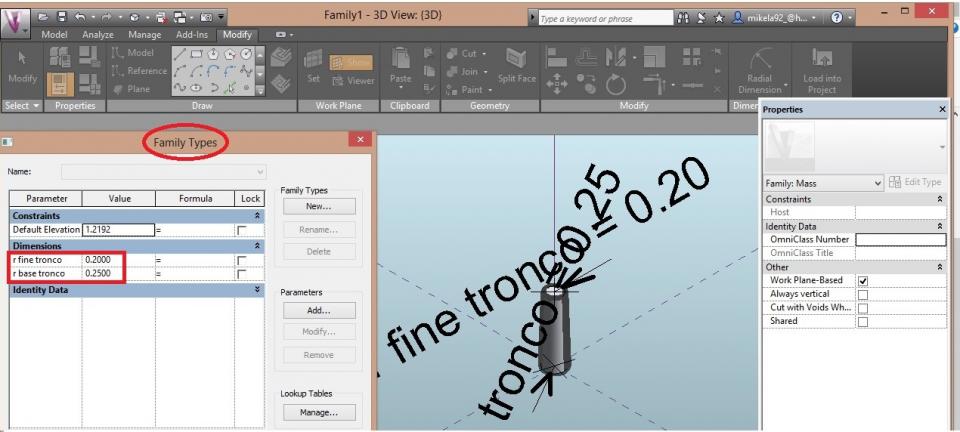
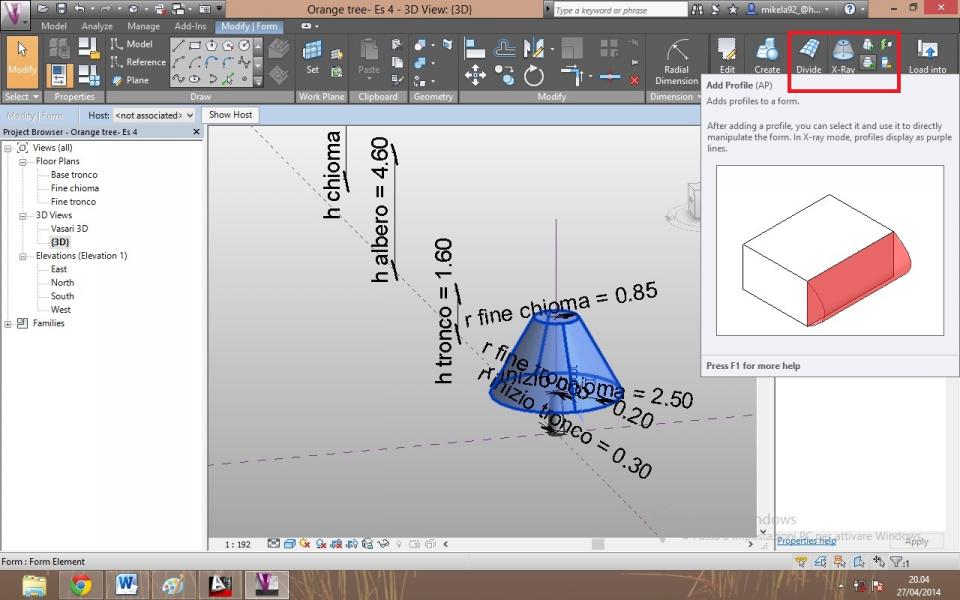
The fourth step is to create the trunk. First of all you have to draw a new line, perpendicular to the circle. That indicates the extrusion direction of the cylinder. This line must be selected and going in the properties, identity data, we have to selected "Is reference line". Then selecting the circle and the line and clicking on create form, the cylinder will be created. Such as the base also for the final part of the trunk will be parameterized with the same procedure. To do this we can select the cylinder and click on edit profile; after selecting the top of the cylinder we can design the dimention of the radius and add the parameter calling him "end trunk radius".
The fifth step involves the same method used for the trunk to create the crown. We can also add linear dimensions for heights so that they can be modified. This are the total height of the tree, the height of the trunk and the height of the foliage.
The sixth step is for to insert an intermediate level in the mid of the foliage. We select the foliage and going in Modify menu, Form element, we need to click on Add a new profile to add a new level with new parameters which help to create a more real form of the tree.
The last step is to rename the family that now is ready to be inserted into the model, in which we can change the parameters as we want.
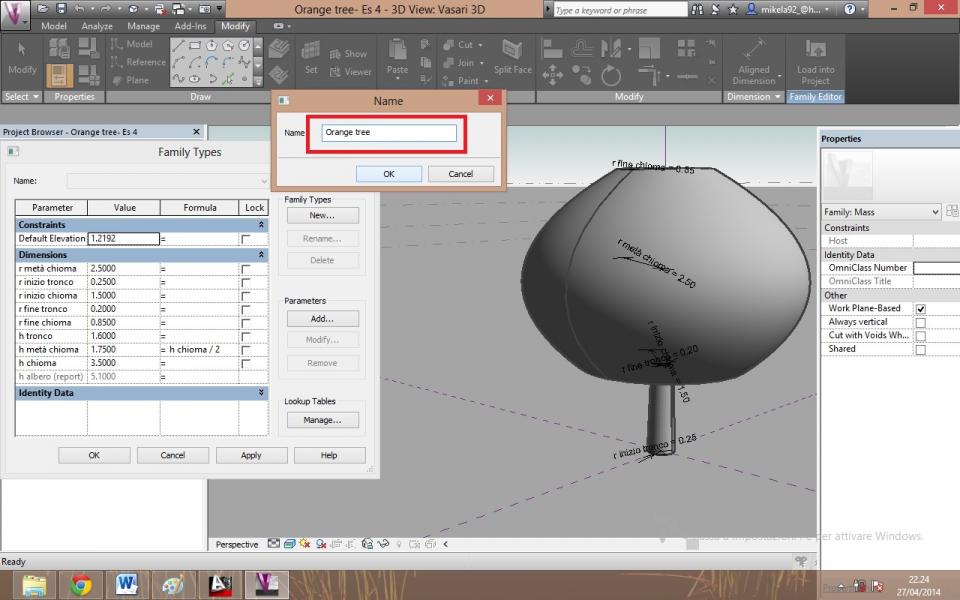
Eventually, changing some parameters I tried to make a three-dimensional model of the tree beside; it’s thinner and younger . After I entered them into the three-dimensional model of my house.

| Allegato | Dimensione |
|---|---|
| 336 KB |